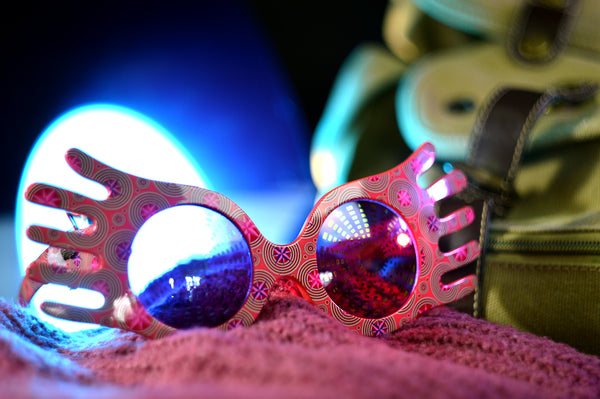
TinyLily Halloween: Harry Potter Luna Lovegood Spectrespecs
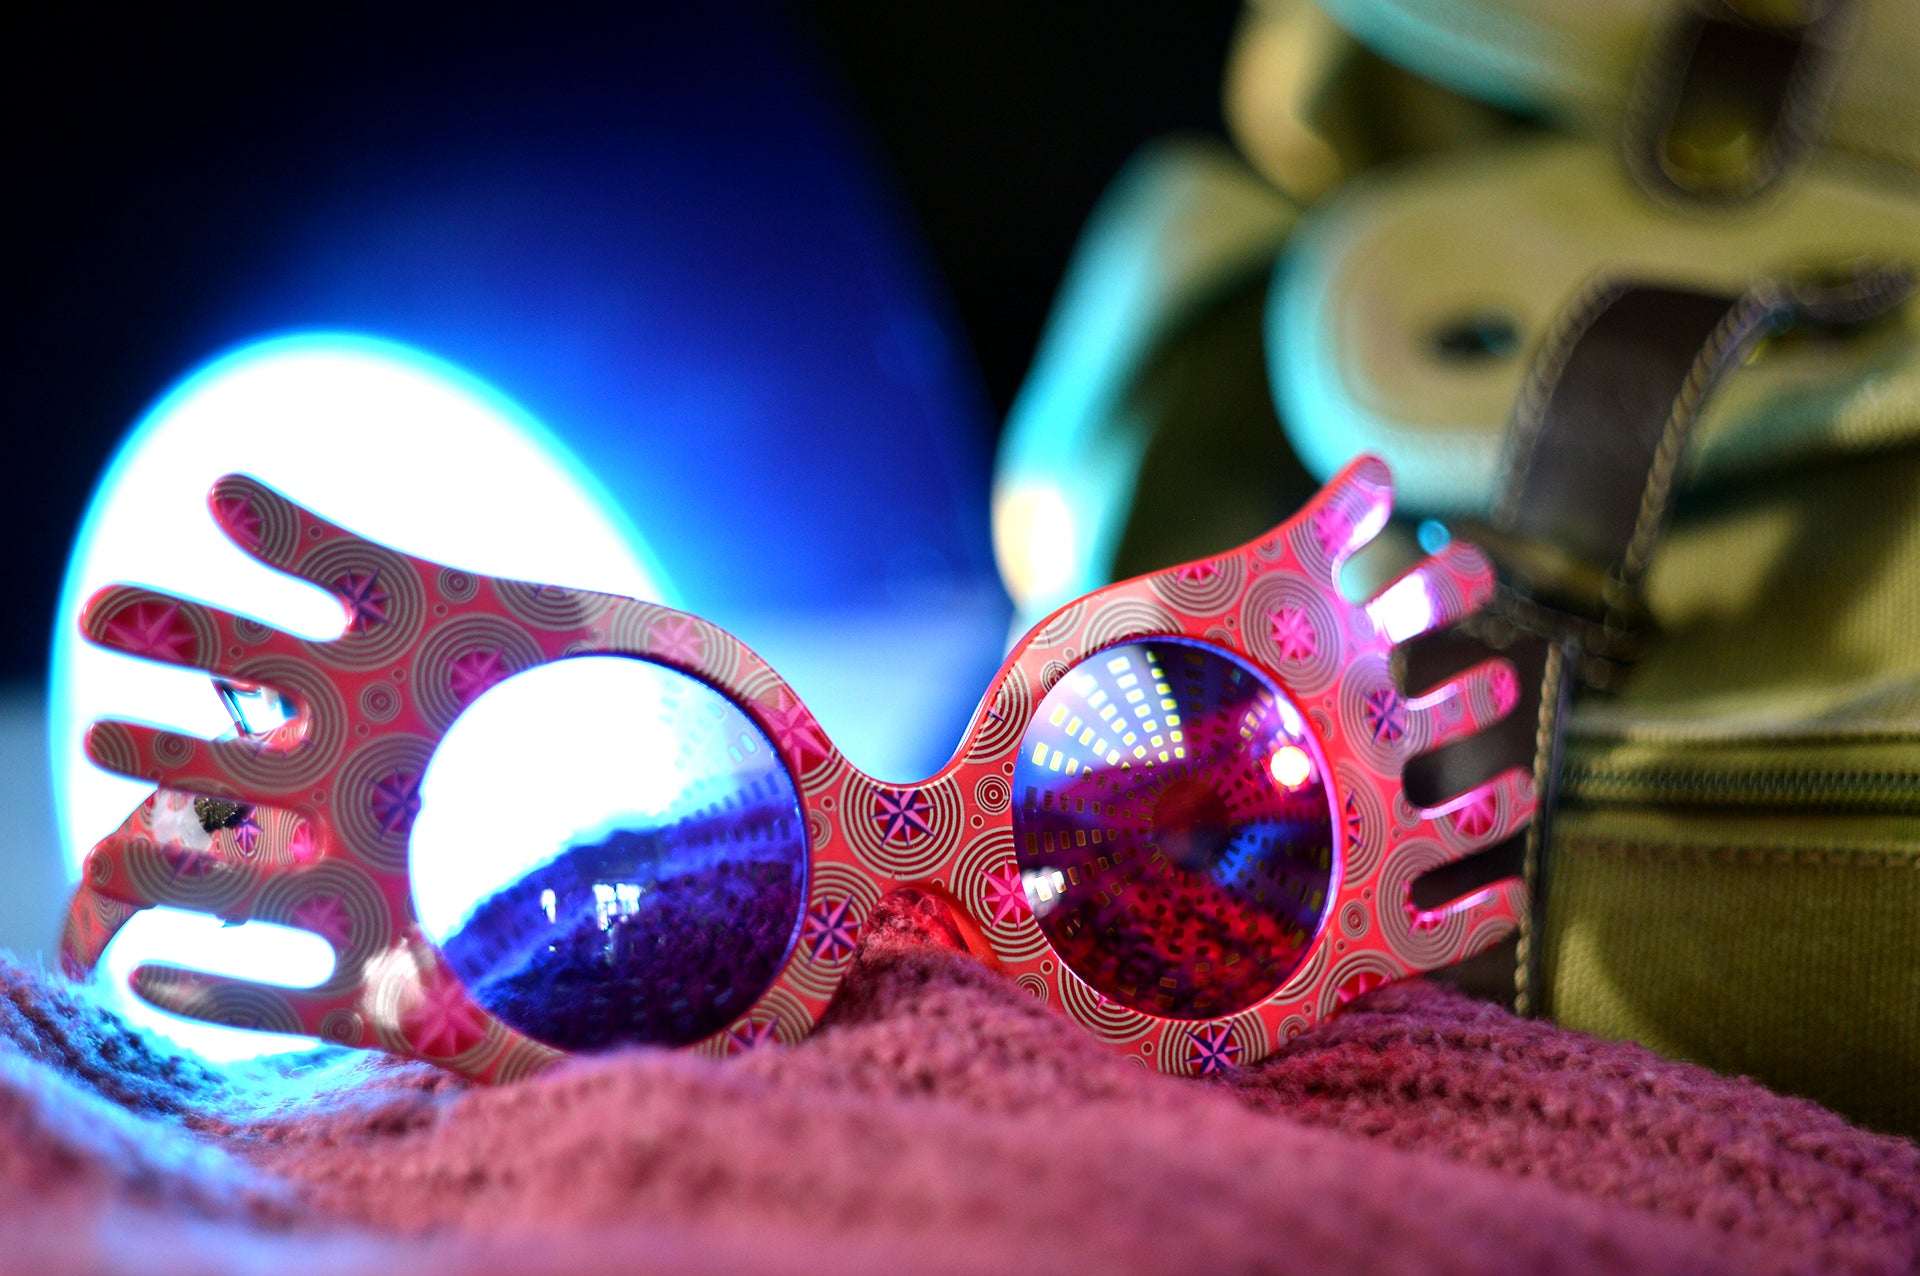
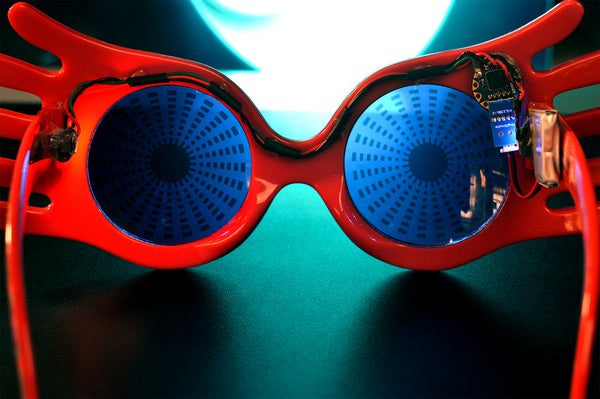
Light up your world with Spectrespecs to see all the wrackspurts out there making minds fuzzy! Using TinyLily RGB LEDs, you can add a brighter dimension to this classic Harry Potter prop.
It is recommended that you visit our Learn Page to view the getting started tutorials for the TinyLily Processor and the TinyLily RGB LEDs before moving further so that you are familiar with the hardware.
Materials
First things first! You will need some Spectrespecs. You have a few options:
I am bad at crafts and impatient with prints, so I bought mine off Amazon. The pair in this tutorial are the same ones from the Amazon link above.
Then you just need the blinky things.
Hardware
- You can get all of this and a whole lot more in the TinyLily Starter Kit!
OR Individually:
- Micro USB Cable
- TinyLily Processor & TinyLily USB Adapter
- TinyLily Battery Adapter (and you will definitely want a Tiny Battery Charger to recharge your battery)
- Lithium Battery (the 150mAh fits pretty well on the glasses)
- (2) TinyLily RGB LEDs
Software:
Extras:
- Basic Soldering Equipment
- Heat Shrink or Tape
- Thin Wire (based on your own preferences!)
- Hot Glue Gun
- Recommended: Double-sided tape
- Optional: Wrackspurts to spot
Background:
Depending on what Spectrspecs you choose to use, you will need to plan where each hardware component will be mounted
I used double-sided tape to place the components where I thought they would fit best so I knew what length of wire to solder:
Step 1: Software
This project uses the FastLED library in order to make the neat fading effects with the TinyLily RGB LEDs as they turn on and off to imitate the disorienting effect of Luna's Spectrespecs. You should already have this library downloaded from going through the TinyLily RGB getting started tutorial.
The Arduino Sketch can be downloaded from the link above under the Software heading. Once downloaded, you can open this program in the Arduino IDE and upload it to your TinyLily Processor using the TinyLily Micro USB Adapter and the following selections made under the Tools tab:
- Board: "Arduino Pro or Pro Mini"
- Processor: "ATmega328p (3.3V, 8MHz)"
- Port: "COM##" - this is the port connected to the TinyLily via the MicroUSB cable
If there are no errors upon upload, your TinyLily processor should be ready for soldering!
Optional: You can use testing leads connected to the TinyLily RGB LEDs, and pins A0 and 0 to determine whether the program has successfully uploaded or not.
Step 2: Hardware Assembly
Although the TinyLily platform is meant to be an E-Textile platform for sewable electronics, they work pretty great for soldering!
Here is a small diagram of what the soldering connections will look like, given the pin assignment in the attached program, and the setup of how the electronics will fit into the glasses.
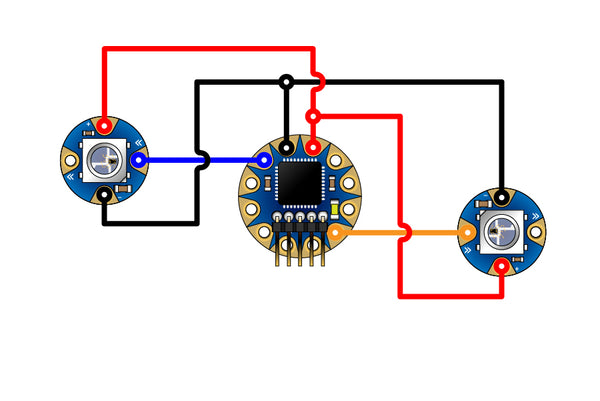
The left TinyLily RGB will be the Red LED using Pin A0 (blue wire), and the right will be the Blue LED using Pin 0 (yellow wire)
Something you may immediately notice are the GND and VCC connections are doubled. There are two different VCC and GND pins available to use on the TinyLily Processor, but I decided to double up on connections using the top set of VCC and GND pins to make wire maintenance easier to handle within the glasses. You can do this by soldering the VCC and GND connecting wires together before soldering them to the TinyLily Processor.
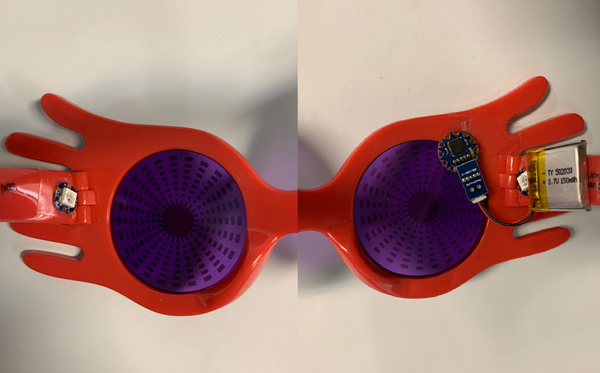
Here is the end product of what the soldered components should look like in the glasses:
While making the soldered connections, I used heat shrink (you can use electric tape or any other kind of tape instead) around the wires leading to the left side of the glasses to keep them tightly together. Then I put a dab of hot glue at each of these points to keep them secured to the glasses.
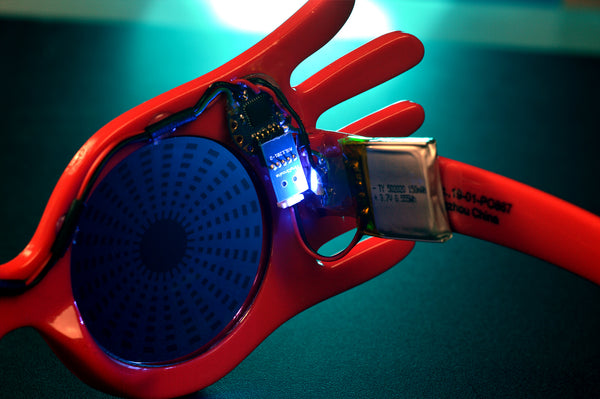
To keep the TinyLily Processor and TinyLily RGB LEDs in place, I replaced the double-sided tape with a thick layer of hot glue that I used to angle the LEDs more toward the glasses and less toward my eyes. The TinyLily Processor is also angled upward so that the programming and power pins are easier to access for programming the TinyLily, and powering it using the TinyLily Battery Adapter seen in the above picture.

Step 3: Changing the Code!
If you do not like the coloring effects given in this tutorial, you can modify the program easily in a few simple ways.
Speed
You can alter the speed of the colors changing by altering the delay() parameter in the function FillLEDsFromPaletteColors(). You can increase the delay to slow down the color-changing or decrease the delay to speed it up.
Color & Effect
If you want to use completely different colors, or you want the colors to display at the same time, you will want to edit the Palettes. These are special definitions used with the FastLED library, but all you need to know is that they are sequences of 16 different color options you can alter. They are named myPalette_red and myPalette_blue in the given program. All basic colors are available definitions, but you will need to capitalize their names when editing these definitions.
You can see all of the Predefined RGB colors in the header file pixeltypes.h starting at line 594: https://github.com/FastLED/FastLED/blob/master/pixeltypes.h
Brightness
The default brightness for the attached program is set to 64 out of a scale of 255, so the LEDs are set to 25% brightness. This was done in order to have a small lighting effect without damaging my eyesight. If you want your LEDs brighter you would edit the line #define BRIGHTNESS 64 to a different value.
*** These glasses should not be worn for an extended time due to the LED brightness -- they are best suited as a costume prop worn on the top of your head rather than as glasses***
Now you are ready to look for wrackspurts with your Spectrespecs!
Contact Us
As always, if you have any questions or feedback, feel free to email us at info@tinycircuits.com.
Show us what you make by tagging @TinyCircuits on Instagram, Twitter, or Facebook so we can feature it!
Thanks for making with us!