Pi Real Time Weather Forecast
In this tutorial, you'll learn how to acquire data from a webpage and how to present that data on an OLED Wireling on your Raspberry Pi. This tutorial makes a simple daily weather summary display, but this concept can be applied to any kind of data from any webpage for whatever your particular application is.
To get started, make sure you have gone through the Pi Hat Setup Tutorial and OLED Wireling Python Tutorial to have all necessary packages for this project installed on your pi.
Materials
Hardware
Software
- Python 3 (Python 2 is not supported!)
- All Python packages mentioned in the Pi Hat setup tutorial (tinycircuits-wireling, adafruit-circuitpython-ads1x15, and adafruit-circuitpython-busdevice)
- SSD1306 Python package
- liveweather Python Example
- An internet connection
Hardware Assembly
If you haven't already, attach the Wireling Adapter Raspberry Pi Hat to your Raspberry Pi. Then, use a Wireling cable to plug the 0.96" OLED Wireling into Port 0. Finally, plug in your Micro USB cable to power the Pi.
Software Setup
Assuming that you have gone through the Pi Hat Setup Tutorial and OLED Wireling Python Tutorial, all necessary packages for this project should already be installed on your pi.
ThingSpeak
ThingSpeak is an IoT analytics platform service that allows you to request information displayed on a website. To configure ThingSpeak for this project, you will need to create a ThingSpeak account.
Once you are signed in, go to Apps > ThingHTTP.

Then, click the "New ThingHTTP" button to create a new ThingHTTP request. From here, you will need to fill out three fields: Name, URL, and Parse String.
The Name is simply a label for the request - be specific enough so that you do not get lost trying to track down the correct request later!
Example.) Weather-Akron-Condition
The URL field is the full URL of the webpage you are requesting data from. For this project, we are using a weather site:
Example.) https://darksky.net/forecast/41.0814,-81.519/us12/en
Finally, the Parse String is a reference to the particular piece of data you want this request to handle. You obtain this field by going to the webpage you would like to request data from, right clicking on the piece of data you would like, then selecting "inspect element."

Once in the DOM and style inspector, the element you selected should already be selected. Right click the HTML tag containing the data you would like to get, select "Copy," and then "XPath." You will then paste the XPath into the Parse String field.

ex.) /html/body/div[3]/div[1]/span[1]/span[2]/span[1]
You may need to append /text() to the XPath, as some HTML remnants may persist otherwise.
ex.) /html/body/div[3]/div[1]/span[1]/span[2]/span[1]/text()
After this, click the "Save ThingHTTP" button to save your changes. This should allow you to view your ThingHTTP request details. On the right side of your screen should be the ThingSpeak ThingHTTP request URL. You can paste this URL directly into your browser's address bar to view the output of the request. It is a good idea to check this before pasting the URL into the code!
Repeat this process for any other pieces of data you would like to use for your project.
Upload Program
Create a new python file in whichever directory you choose by typing the following into the terminal:
liveweather.py
This will open up the text editor nano where you can simply paste the following code:
Code
You’ll need to change the ThingSpeak request URLs to your own based on the information you want to include in your display. It may be easier to edit this code in a text editor or IDE before pasting into the nano text editor on the Pi.
After changing the URLs and pasting the code, press Ctrl+O to write out the buffer, press Enter to save the buffer to liveweather.py, and then press Ctrl+X to exit.
Before running this program, be sure that the pigpio service is running on your Pi. This service can be started by typing:
sudo pigpiod
After this, you will be able to run the program by running the following command in the terminal:
sudo python3 liveweather.py
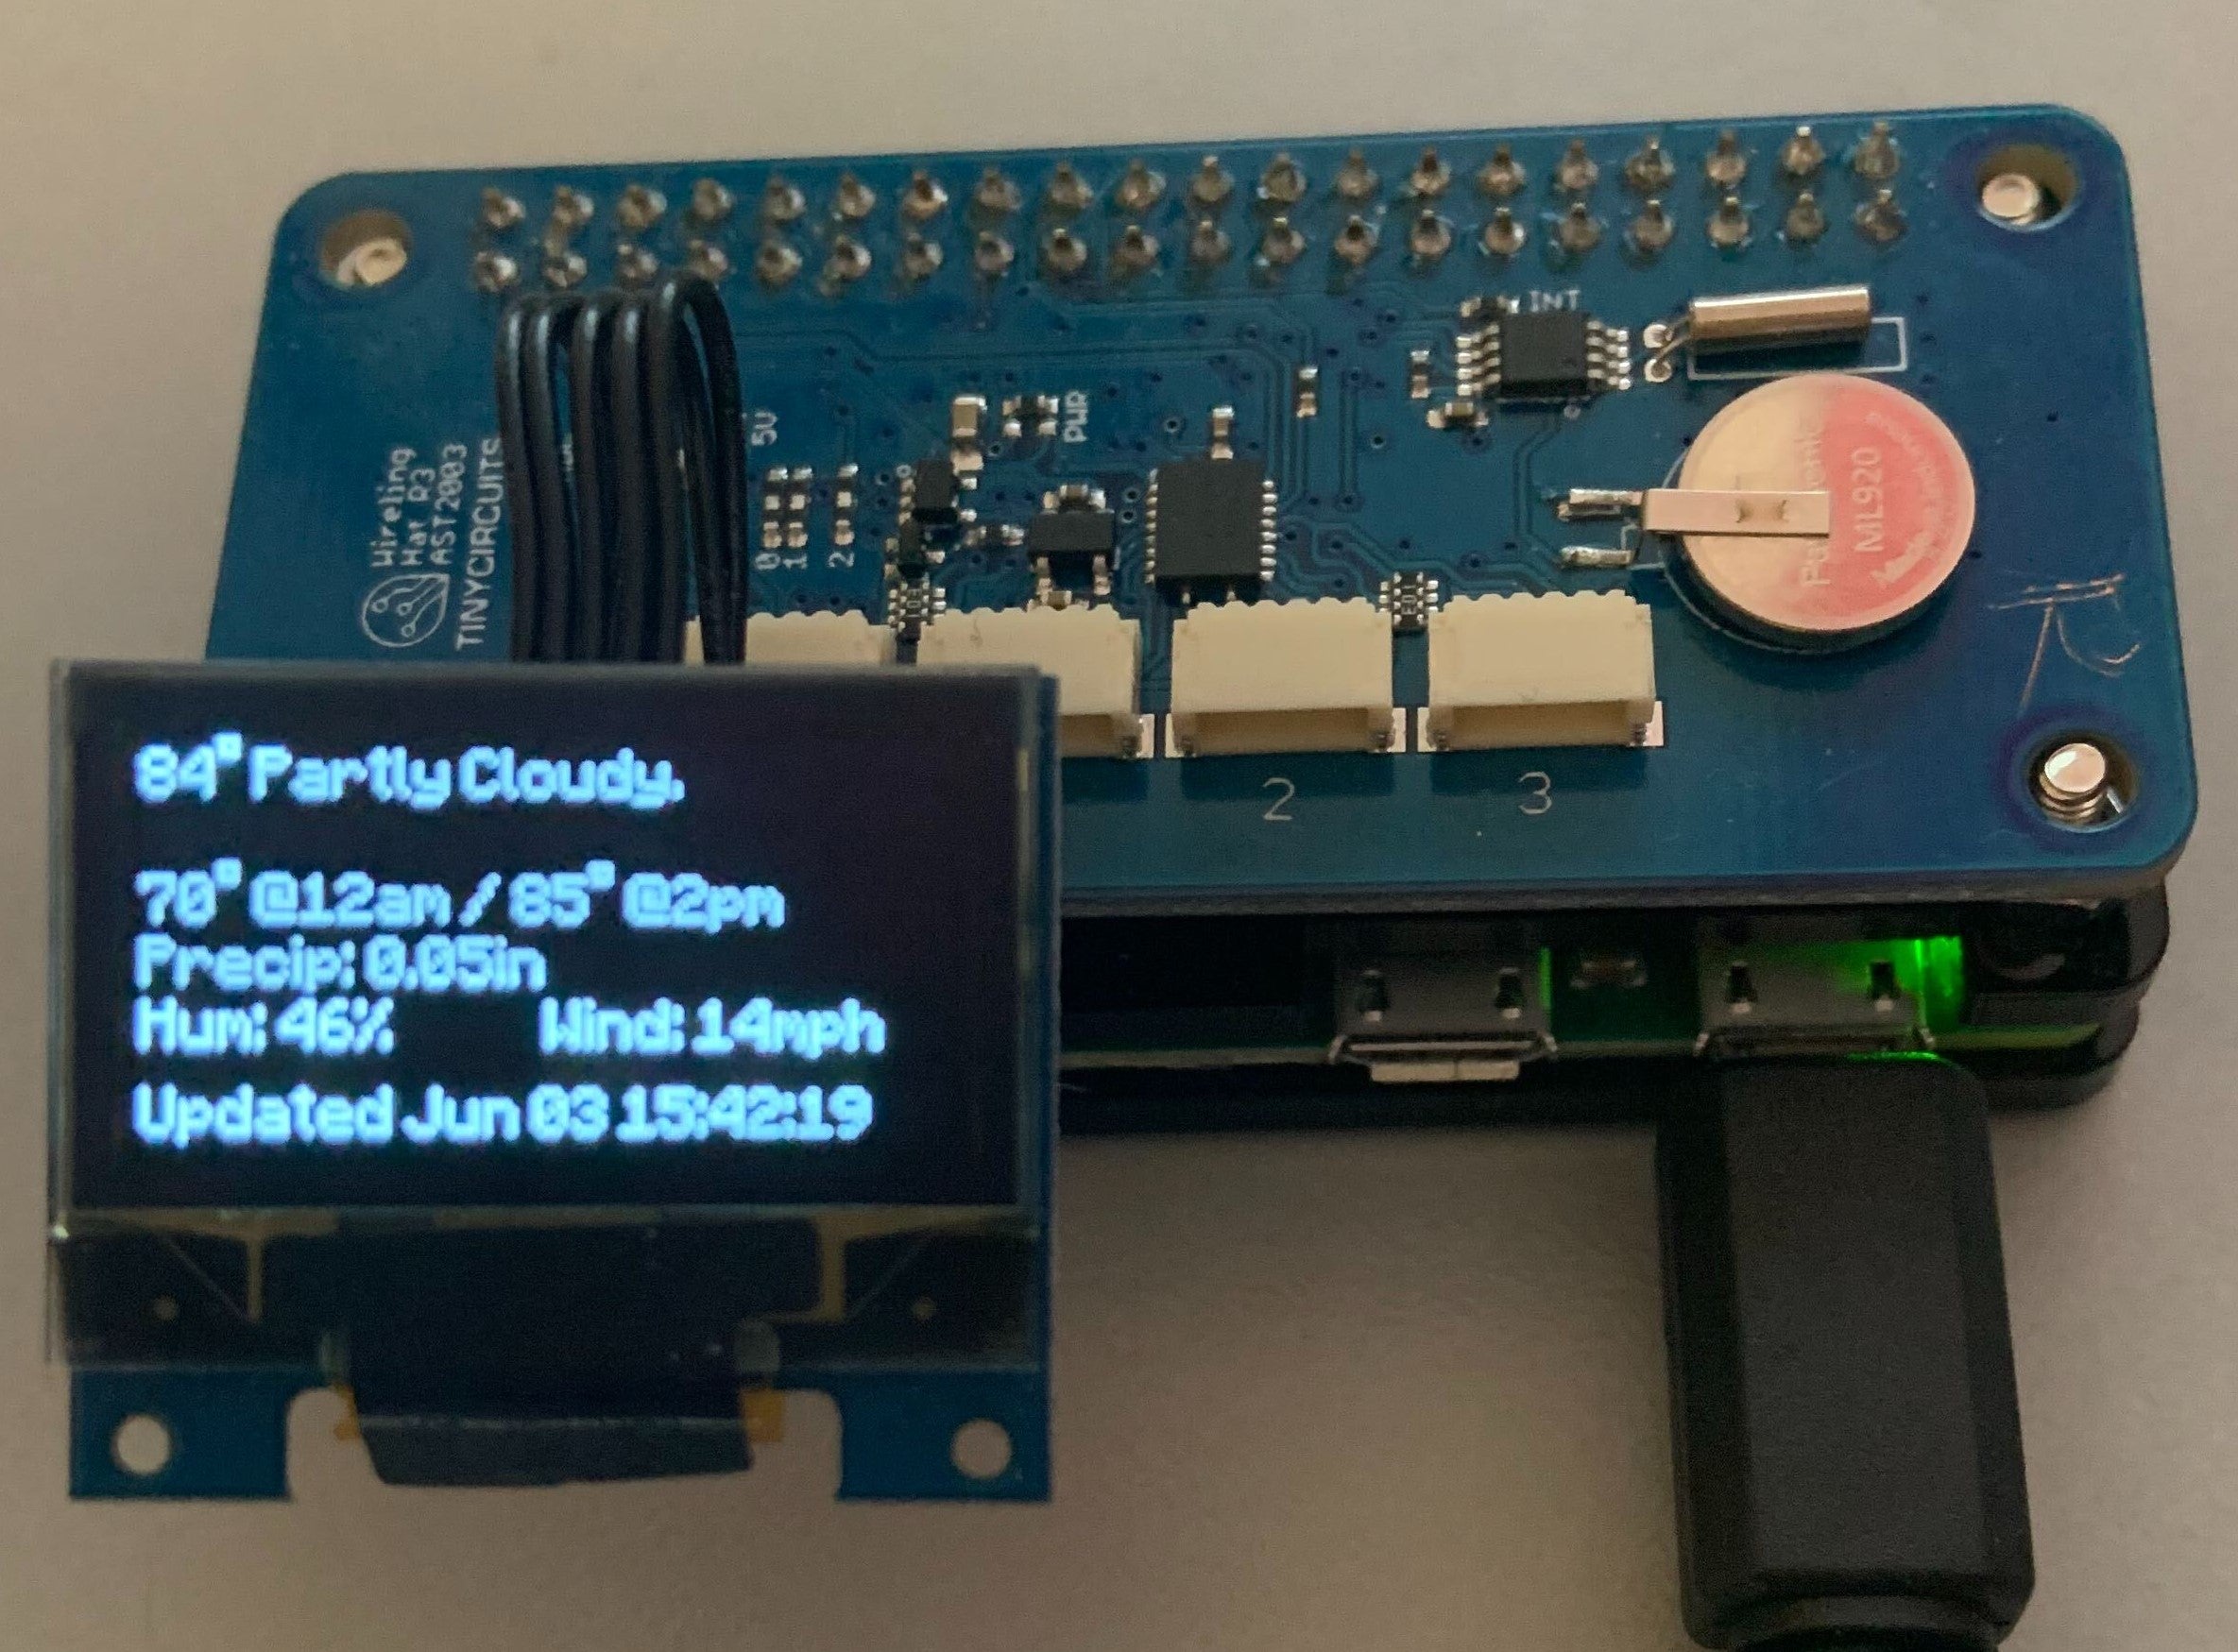
The program should now run and the values acquired via ThingSpeak will be printed to the OLED display. Terminate execution at any time by pressing Ctrl+C. It may take a moment to see the first pieces of data since several separate ThingSpeak requests have to be processed each time the loop runs.

Contact Us
If you have any questions or feedback, feel free to email us or make a post on our forum. Show us what you make by tagging @TinyCircuits on Instagram, Twitter, or Facebook so we can feature it.