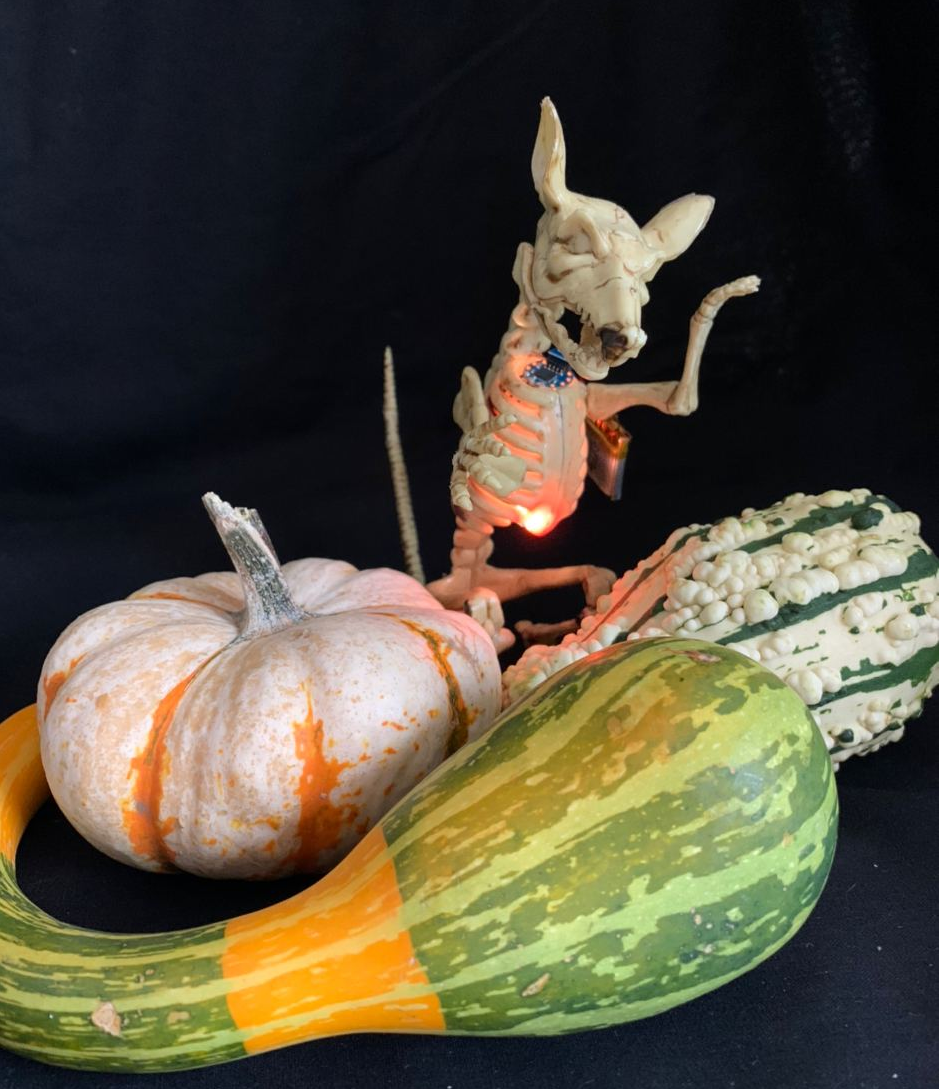
Halloween Decoration Candle Flickering with TinyLily RGB LED

It is time to get spooky for Halloween, Samhain, and Día de muertos! This LED Fire Effect can help make your decorations last longer and be less fire-reliant!
If this is your first time using TinyLily electronics, be sure to check out the TinyLily Processor and TinyLily RGB LED tutorials for some background!
Materials
Hardware:
- Micro USB Cable - to program my TinyLily Processor
- TinyLily and TinyLily USB Adapter - the brain of the project
- (1) TinyLily RGB LED - to simulatea flame
- TinyLily Battery Adapter - to use project wirelessly
- Tiny Battery Charger- to recharge batteries
- Lithium Battery - power source
- Kits are the best way to get all of these items:
- TinyLily Basic Kit - Doesn't include everything above, but it's a great place to start.
- TinyLily Starter Kit - Includes everything above and more!
- Basic Soldering Equipment (Soldering Iron, insulated wire, solder wire) - this is if you prefer soldering to sewing with conductive thread!
Software:
- Arduino IDE
- FastLED Arduino Library
- Fire Effect Example
- You can use a Jack-O-Lantern, or any spooky decorations you have, you can even 3D print a Ghost on Thingiverse
Hardware Assembly
The circuit is a simple three connections from the TinyLily Processor to the TinyLily RGB LED.

Connect either one of the power (+) and ground (-) tabs to the power and ground on the TinyLily RGB LED, and then you can choose any of the GPIO pins available on the TinyLily to connect to the IN tab of the LED. I used pin 3 for this project, as can be seen in the above image. You can use any pin, but make sure that if you use a different pin that you change the program to reference that pin!
FastLED library
The fantastic FastLED library makes programming RGB LEDs easy!
To make the library usable for Arduino, you have to rename it, as noted in the README on the GitHub page of the library. But I already did that so you can download a ready-to-work copy in a zip file here:
After you unzip the library, move it to your Documents/Arduino/libraries folder so that your Arduino sketch program can use it.
The Code!
There is a fire effect example that comes with the library, and all you need to do to get it working is changing the pin, and the amount of LEDs. Here's my copy of the code I used:
Download the program zip file, and open it in the Arduino IDE. Connect your TinyLily processor to your computer using the TinyLily microUSB adapter, and a microUSB cable.
Make the correct tools selections to program the board:
- Board: "Arduino Pro or Pro Mini"
- Processor: "ATmega328P (3.3V, 8 MHz)"
- Port:
- Windows: "COM#"
- Mac: "/dev/cu.usbserial-DMS00S##"
And click the Upload button to upload the program.

Changing Brightness
The default brightness for the attached program is set to 128 out of a scale of 255, so the LEDs are set to 50% brightness. This was done to save power in my case, as will be discussed later on. If you want your LEDs brighter you would edit the line:
#define BRIGHTNESS 128
Changing Colors
I chose to use the typical colors for a candle flame included in the fire effect example, but there are other effects available in the program.
If you want to go more in depth, you can change the individual colors using a color palette function referenced in the library. You can see all of the Predefined RGB colors in the header file pixeltypes.h starting at line 594: https://github.com/FastLED/FastLED/blob/master/pixeltypes.h
There are a LOT of colors.
Changing Speed
There are two lines in the fire effect program you can adjust the values of to create a desired speed/flame effect:
// COOLING: How much does the air cool as it rises?
// Less cooling = taller flames. More cooling = shorter flames.
// Default 55, suggested range 20-100
#define COOLING 55

// SPARKING: What chance (out of 255) is there that a new spark will be lit?
// Higher chance = more roaring fire. Lower chance = more flickery fire.
// Default 120, suggested range 50-200.
#define SPARKING 120
Depending on what effect you are trying to achieve, you may end up changing both of these values.
Powering the LEDs

You can make your project last longer by using a bigger battery, turning down the brightness of your LEDs, or adding in some power control like a switch so that you're only using power when you choose.
No matter what, it is good to know roughly how long a project will last before you need to recharge, change batteries, or unplug it to conserve power. The current draw of the RGB LEDs depends on colors and brightness:
- Red: 30mA
- Green: 20mA
- Blue: 30mA
- White: 65mA
With one RGB LED, we have around 65mA to supply in the worst case of displaying white at the brightest setting, depending on your battery this might not last long at all. Fortunately, there is a mixture of colors for this example which lessens power consumption a lot, sometimes by half.
The brightest setting of these LEDs is extremely bright and difficult to look at, which is great because more brightness draws more power. The power and color of the LEDs is controlled using Pulse Width Modulation (PWM) on a range of 0-255. 255 is the max brightness of 100%. 0 will visibly turn your LEDs off, but a small amount of current will still be supplied (around 1mA.) The duty cycle directly correlates to the power consumed, so at around 50% brightness or 128 duty cycle (referenced as BRIGHTNESS in the program) draws in the worst case, that puts the power consumption of my program at 65/2 = 32.5mA.
So I know with a full charged 150mAh battery that I will have around 150mAh / 32.5mA = 5 hours of time for my rat decoration candle to remain lit. Plenty of time for trick or treating!
Contact Us
Share what spooky decorations you make by tagging @TinyCircuits on Instagram, Twitter, or Facebook so we can feature it!
As always, if you have any questions or feedback, feel free to email us at info@tinycircuits.com.
Thanks for making with us!

