Pulse Sensor on OLED Display with Wirelings

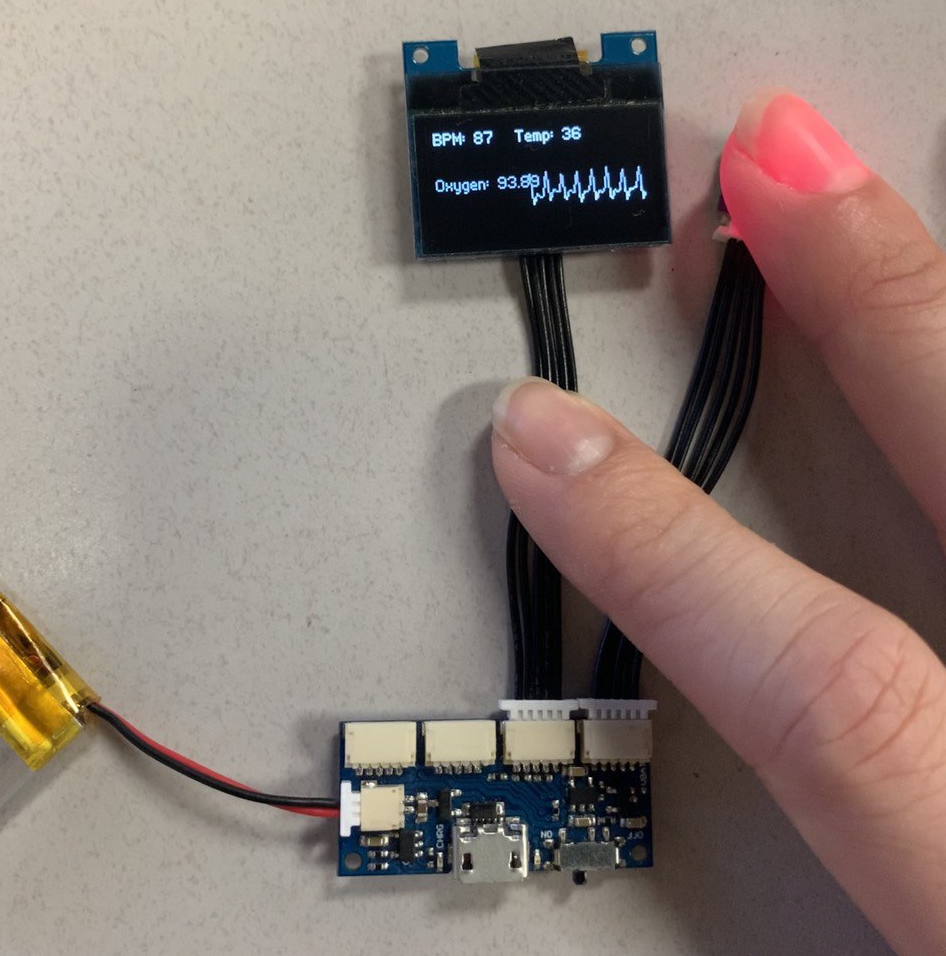
One of the best ways to understand cardiogram data is to view a pulse graph! This tutorial shows you how to read data from the Pulse Oximeter Sensor Wireling and display the temperature in degrees Celsius, BPM, saturated oxygen level, and (visually most importantly) the cardiogram output on any of the OLED Screen Wirelings (0.42", 0.69", and 0.96").
Make sure to go through the OLED Screen Wireling Tutorial and the Pulse Oximter Sensor Tutorial so that you have all the software you need.
Materials
Hardware:
- Micro USB Cable
- (2) Wireling Cables
- Pulse Oximeter Sensor Wireling
- OLED Screen Wirelings (0.42" OLED Wireling and 0.96" OLED Wireling work best, but you can still use the 0.69" OLED Wireling)
- See the table below for the Wireling processor/adapter that works best for you:
| Processor | Adapter |
|---|---|
| * and | |
| * | |
| * | |
| Not needed | |
| * | Not needed |
| Arduino | |
| Raspberry Pi |
* These processors have a 32-pin connector and can have multiple Wireling Adapter TinyShields stacked to increase the number of Wireling ports up to a maximum of 32 total Wireling ports per processor.
Software:
- Arduino IDE
- TinyCircuits MAX30101 Library with examples
- TinyCircuits OLED Display Wireling Libraries
Extras:
- A pulse!
Hardware Assembly
Depending on the development system you choose, you will need to put together a TinyDuino stack using the 32-pin tan connectors, or you will just need to plug in your Wirelings using a Wireling Cable:
- Port 0: Pulse Oximeter Sensor Wireling
- Port 1: OLED Display Wireling (any of the sizes will work as long as the screen variables are edited in the program)
You can change these ports in the included Arduino Sketch using the port variables at the beginning of the program. Match the port number found on the board with the port value set in the code.
Software Setup
To install the MAX30101, Tinier Screen, and Graphics Buffer Arduino libraries, check out our Library Installation Page. Once downloaded from the software section above, you can navigate to the examples folder of the MAX30101 library and open the MAX30101_OLED.ino sketch in the Arduino IDE.
Make the correct Tools selections for your development board. If unsure, you can double-check the Help page that mentions the Tools selections needed for any TinyCircuits processor.
The Code!

The program is initialized to work with the 0.42" OLED Screen Wireling. To edit this in the program, comment and uncomment the two lines that match the screen you have so that only the two lines matching your screen are uncommented:
TinierScreen display = TinierScreen(TinierScreen042);
//TinierScreen display = TinierScreen(TinierScreen069);
//TinierScreen display = TinierScreen(TinierScreen096);

GraphicsBuffer screenBuffer = GraphicsBuffer(72, 40, colorDepth1BPP);
//GraphicsBuffer screenBuffer = GraphicsBuffer(96, 16, colorDepth1BPP);
//GraphicsBuffer screenBuffer = GraphicsBuffer(128, 64, colorDepth1BPP);
Contact Us
If you have any questions or feedback, feel free to email us at info@tinycircuits.com.
Show us what you make by tagging @TinyCircuits on Instagram, Twitter, or Facebook so we can feature it!
Thanks for making with us!

