Moisture Sensor Wireling Animation
Interested in knowing the moisture level of your plant? This tutorial will show you the basics on how to read the level of moisture from the Soil Moisture Wireling and create a nice graphic display of the information.
Materials

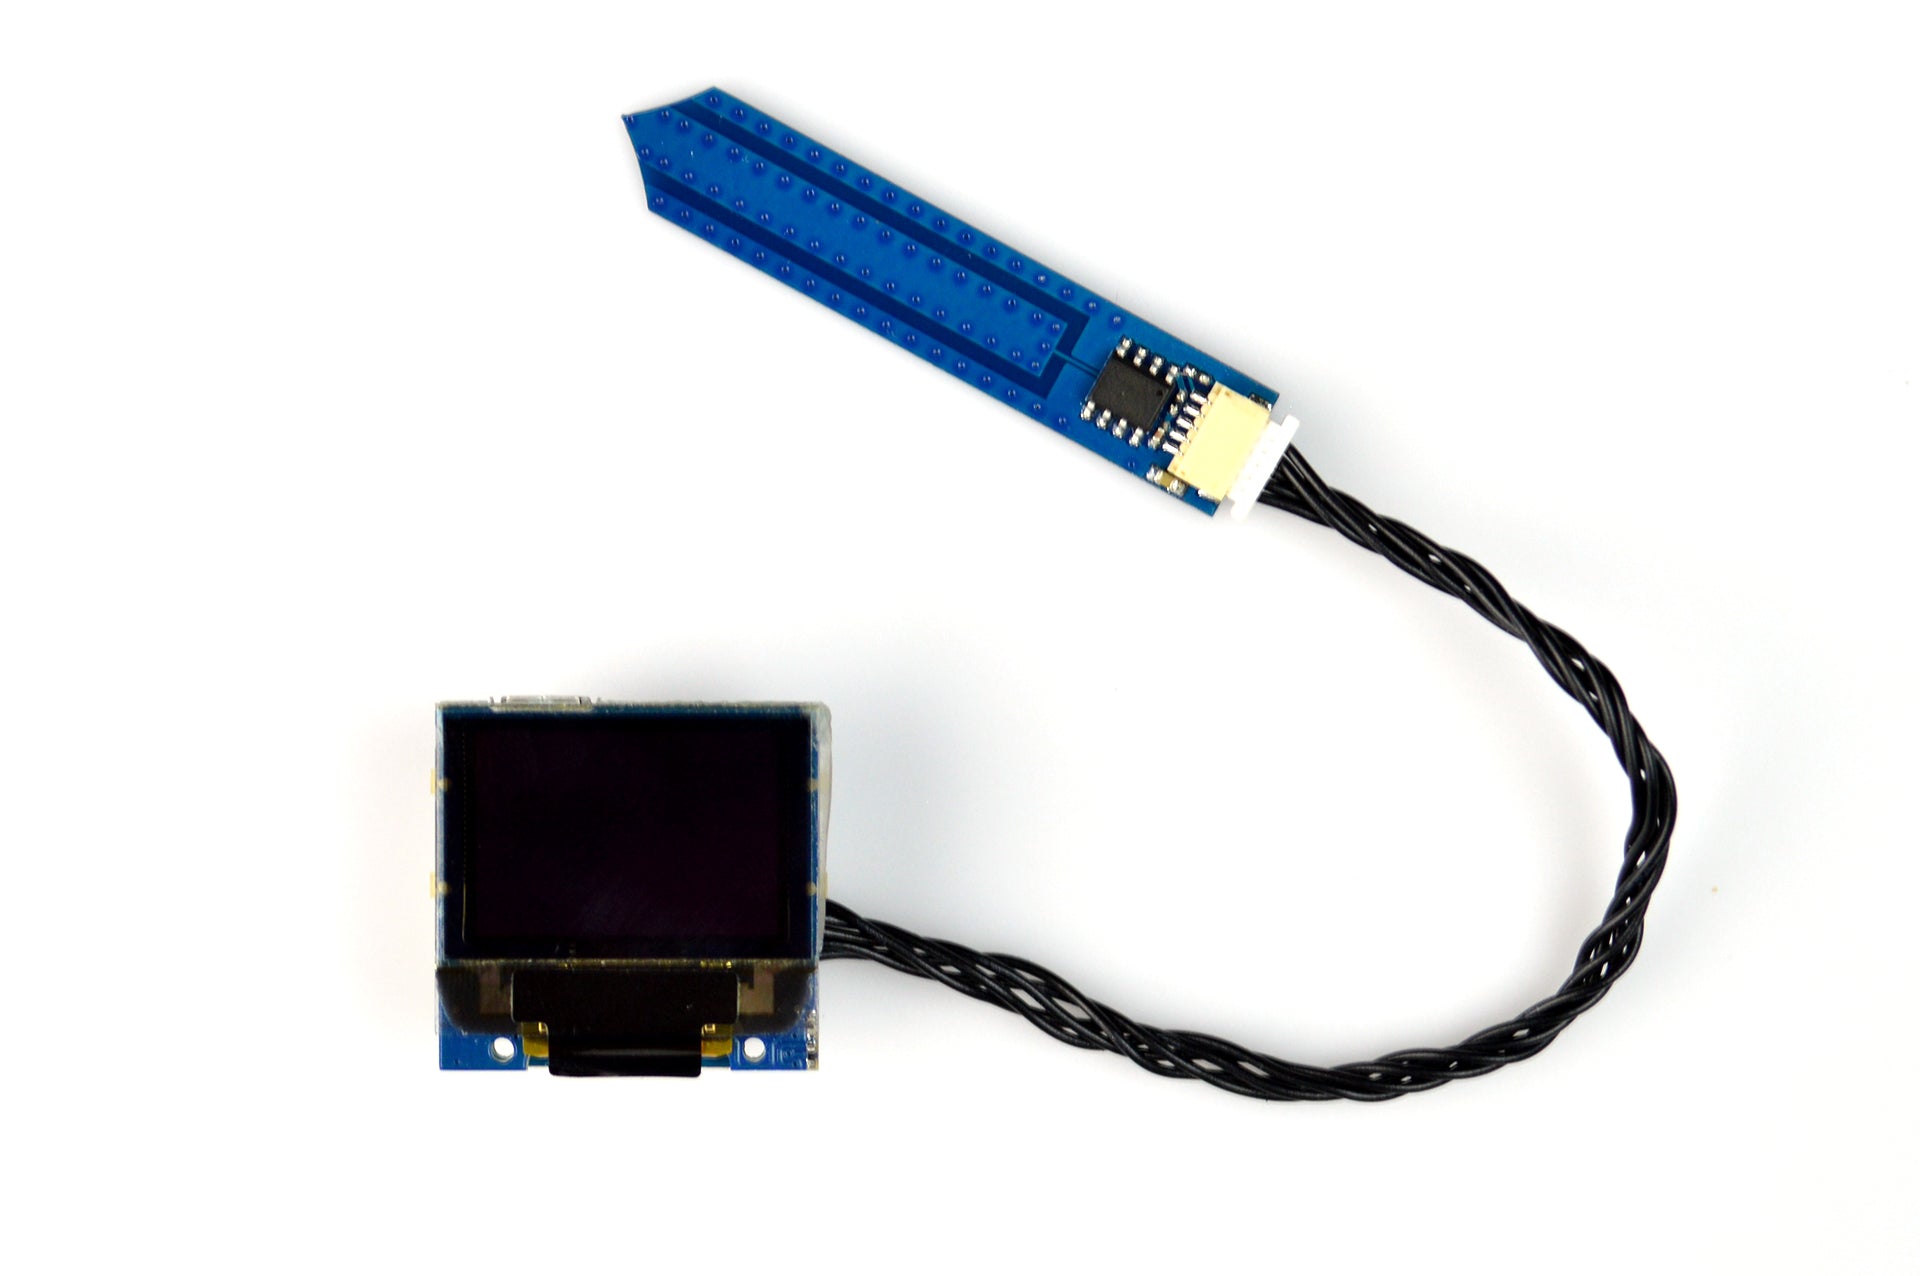
5-pin wire connector (left), TinyScreen+ (top-center), Soil Moisture Wireling (center), Wireling Adapter TinyShield (top-right)
- Micro USB Cable (not pictured)
- TinyScreen+
- Wireling Adapter TinyShield
- Soil Moisture Wireling
- (1) Wireling Cable
- Optional: Battery
Software:
- Arduino IDE
- TinyScreen Library (In Library Manager of Arduino IDE)
- TinyScreen+: Soil Moisture Wireling Example Sketch, with animation & calibration
- Basic Soil Moisture Example used in Soil Moisture Wireling Tutorial
Extras:
- A plant
- Water
Some important things:
- Each Soil Moisture Wireling reads values a little differently. The provided code has graphical and text input options for calibrating your sensor if needed. See Step 4 on this page for instructions.
Step 1: Assembly
All you need to do here is attach your Wireling Adapter TinyShield to the TinyScreen+, and attach the Moisture sensor to the Adapter Shield with the 5-pin cable! If using the provided code, make sure to plug the sensor into port 0 on the Adapter Shield (port numbers are on the back of the board.)

Soil Moisture Wireling Connected to Wireling Adapter TinyShield On Top of TinyScreen+
Make sure the TinyScreen+ is powered on, and use the Micro USB cable to connect the hardware to your computer.
Step 2: Software (Setup)
Make the correct Tools selections for your development board. If unsure, you can double-check the Help page that mentions the Tools selections needed for any TinyCircuits processor. Then upload the program to the TinyScreen+, or development board of your choice.
If you don't have the TinyScreen library yet, go to Sketch -> Include Library... -> Manage Libraries... -> type in "tinyscreen" to the search bar, and download the library! If it's your first time using a TinyScreen+, please go through the TinyScreen+ Setup Tutorial.

TinyScreen library in the Library Manager
Step 3: The Code!
Download the Soil Moisture Wireling example sketch with animation and calibration from the software section in 'Materials'. This sketch will be used in steps 4 and 5.
After downloading the zipped file with animation go to the download location and extract the zip file. In the extracted folder open the Soil-Moisture-Monitoring_example.ino file in the Arduino IDE and upload it to the TinyScreen+.
Step 4: Testing
First, upon uploading the sketch from the downloaded zip file you will see a screen like in the below picture.

Now that the code is uploaded to the board, there are two ways you can look at the moisture level detected by your Wireling. One way is on the screen itself (the easiest way) or in the Arduino IDE's serial monitor (The serial monitor is accessible from the Arduino IDE through Tools > Serial Monitor). If you are using a screen, touch the Soil Moisture Wireling with your fingers and watch the bar change on the screen:

Serial Monitor: TinyZero or TinyDuino
Step 5: Calibration
Both download links in the code section have hardcoded values in the programs that we obtained here at TinyCircuits for you! This means you don't need to calibrate anything yourself unless you feel like customizing what your readings mean, or if you feel you can make them more accurate. If this is your first time using the Soil Moisture Wireling, then you can skip this step and you're done!
Before starting any kind of calibration, make sure your sensor is dry, clean, and that you don't touch the sensor with your fingers during the process.
There are two ways to calibrate your sensor if you are using our code, with the TinyScreen's screen or using the Arduino IDE serial monitor. Both methods are separated below. Method one uses the screen and method two uses the serial monitor, choose whichever fits your needs!
Method 1: Calibrating the Soil Moisture Wireling using the TinyScreen+ screen
On the TinyScreen+ board press the button directly beside the power switch. The screen will then display: "Hold sensor in AIR and press any button (hold by wire only)." After pressing a button it will take some readings and then display them to you. The next instruction displayed will say "Submerge sensor in WATER and press any button." Submerge the Soil Moisture Wireling in a glass of water to just under the black microchip on the sensor (the position/level is shown below as a red line).

Soil Moisture Wireling Calibration Submerge Level
The sensor is coated so short circuits are not a problem but try not to let the water get above the chip and touch the tan 5-pin connector. After submerging it press any button and it will take some more readings and display the result like last time, calibration is done!
Method 2: Calibrating the Soil Moisture Wireling using the Arduino IDE serial monitor
Connect your board to your computer, open the Arduino IDE, and then open the serial monitor from Tools > Serial Monitor. To start the calibration process enter the letter 'c' (press c then Enter) in the top input box marked below in red.

Arduino IDE Serial Monitor With Input Box Marked
A line will be printed stating that the calibration process has started and then it will say, "Hold the sensor in the AIR and press any button or enter 'n' (hold by wire only)." Enter the letter 'n' while holding the sensor in the air. After taking some readings and then displaying the result you will be asked to "Submerge the sensor in WATER and press any button or enter 'n'." You will only need to submerge the sensor to under the black chip on the Wireling. The level to submerge the sensor too is shown above in the picture titled "Soil Moisture Wireling Calibration Submerge Level" in the method one section of calibration. After putting the sensor in water and entering 'n' it will take readings and display the result, you're done!
NOTE: If the message "The range is not big enough! Setting offset and range to defaults" appears, this means the sensor was not submerged in water. It will go back to using hardcoded values. This message will be shown when using any of the two methods of calibration above if anything goes wrong.
Contact Us
As always, if you have any questions or feedback, feel free to email us at info@tinycircuits.com.
Show us what you make by tagging @TinyCircuits on Instagram, Twitter, or Facebook so we can feature it!
Thanks for making with us!