TinyServer Door Monitor Tutorial
In this tutorial, we will be focusing our attention to the TinyShield Wi-Fi board. We will test the shield to make sure it works properly and use it to make a door sensor that can be viewed from a device on your local network. Before starting, the proper drivers must be installed to detect the COM ports. These drivers must be installed before downloading any codes from the codebender plugin. The drivers needed can be found here.
Step One: Preparations


To kick things off, you will need the boards and the software. Adafruit's CC3000 library will be the only thing to download. For this tutorial, we will be looking at and modifying the HTTPServer example in the Adafruit_CC3000 library. For any questions about installing/downloading libraries, check the link here.
Materials needed
- TinyDuino Processor Board
- TinyShield Wi-Fi Board
- TinyShield USB
- TinyShield Proto Board
- Reed Switch
- 5V Wall Adapter
- Wire
- Magnet
Tools Needed
- Soldering Iron
- Wire strippers
Downloads
- Adafruit CC3000 library: link
Step Two: Pin Assignments & Security Details


The first change that must be made from the example is the assignment of the IRQ, VBAT, and CS pins. The pin assignment is as follows: ADAFRUIT_CC3000_IRQ 2, ADAFRUIT_CC3000_VBAT A3, and ADAFRUIT_CC3000_CS 8. Since we are using the #define feature for these pins, be sure not to include a semicolon after the pin.
Enter your own SSID and Password under WLAN_SSID and WLAN_PASS. Make sure you check the security setting of your wireless router and change the WLAN_SECURITY accordingly. The Adafruit library lists all of the available connection types the CC3000 chip is compatible with.
Step Three: Testing the CC3000


After changing those few settings, upload the program and view the COM port. When everything has been setup and initialized, we will be able to read the IP address, net mask, gate way, DHCP server, and DNS server. The board will also be “Listening for connections…” with the IP address that was displayed, go to your web browser of choice and enter that number in the address bar. After going to the address, two things should happen. The Web browser will display a webpage, and the COM window will show you that a client has been connected and what requests the client is making.
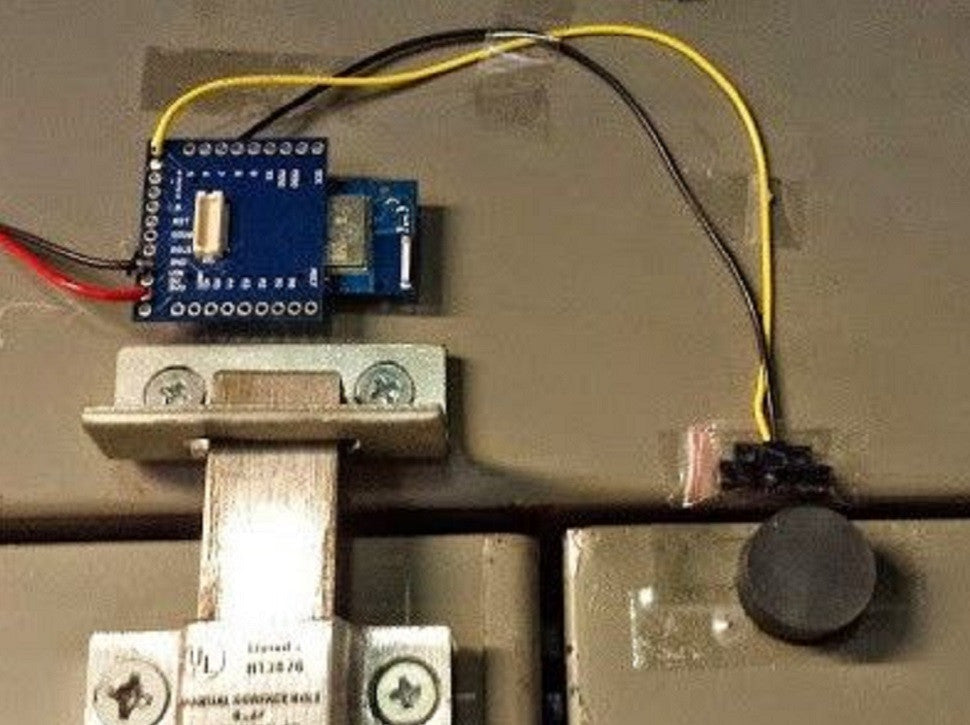
Step Four: The Buildup

Now that we know the CC3000 is working properly, let’s make a door sensor. Grab your protoboard, soldering iron, and reed switch. While using the Wi-Fi board, the pins 3-7 are going to be available for use. To make sure that your board will get power, take your 5V wall adapter and solder the red wire to the 5V terminal on the protoboard and the black wire to the ground terminal. We will use pin 3 for the reed switch, so solder one end of it to terminal 3 and the other end to the ground terminal. With the reed switch, if a magnet is near the switch the circuit will be will be shorted to ground. Now, we will make our server tell us whether the door is open or closed.
Step Five: Reed switch/html setup

In the setup part of the code assign pin 3 as an INPUT and digital write it HIGH. That way, when the door is closed and the reed switch completes the circuit, pin 3 will be shorted to ground making it easier to read. In the main loop find the line of code inside the “ if (parsed) “ section that reads “client.fastrprintln (F("Content-Type: text/plain"));” change plain to html so that the content read from the client will be displayed in html format as a webpage.
Using client.fastprint(F()), we can create a nice, basic webpage. For more information on html, check the link here. We will now create the part of the code that will tell us whether the door is open or closed.
Step Six: Reading the Switch


In the body of the code, we will perform a digital read on pin 3. If the pin reads zero, the reed switch has been grounded, the magnet is near indicating that the door is closed. If anything else, the pin will be read high and the door will be shown as open. We also want to display a button in order to refresh the page to check the state of the door. With this last bit of code, upload it and mount your switch. We now have a fully functional door sensor that can be viewed on your own local network!
Step Seven: Entire Code
Here is the code used in the example for anyone who wants to see it. All of the required libraries are included, however they have been slightly modified to work with code bender. If you have all the libraries downloaded, simply copy the .ino text and paste it into your sketch. You can also upload the code directly to your TinyDuino using the window below.